Getting Starting with Gametime Announcer
Edit the Settings
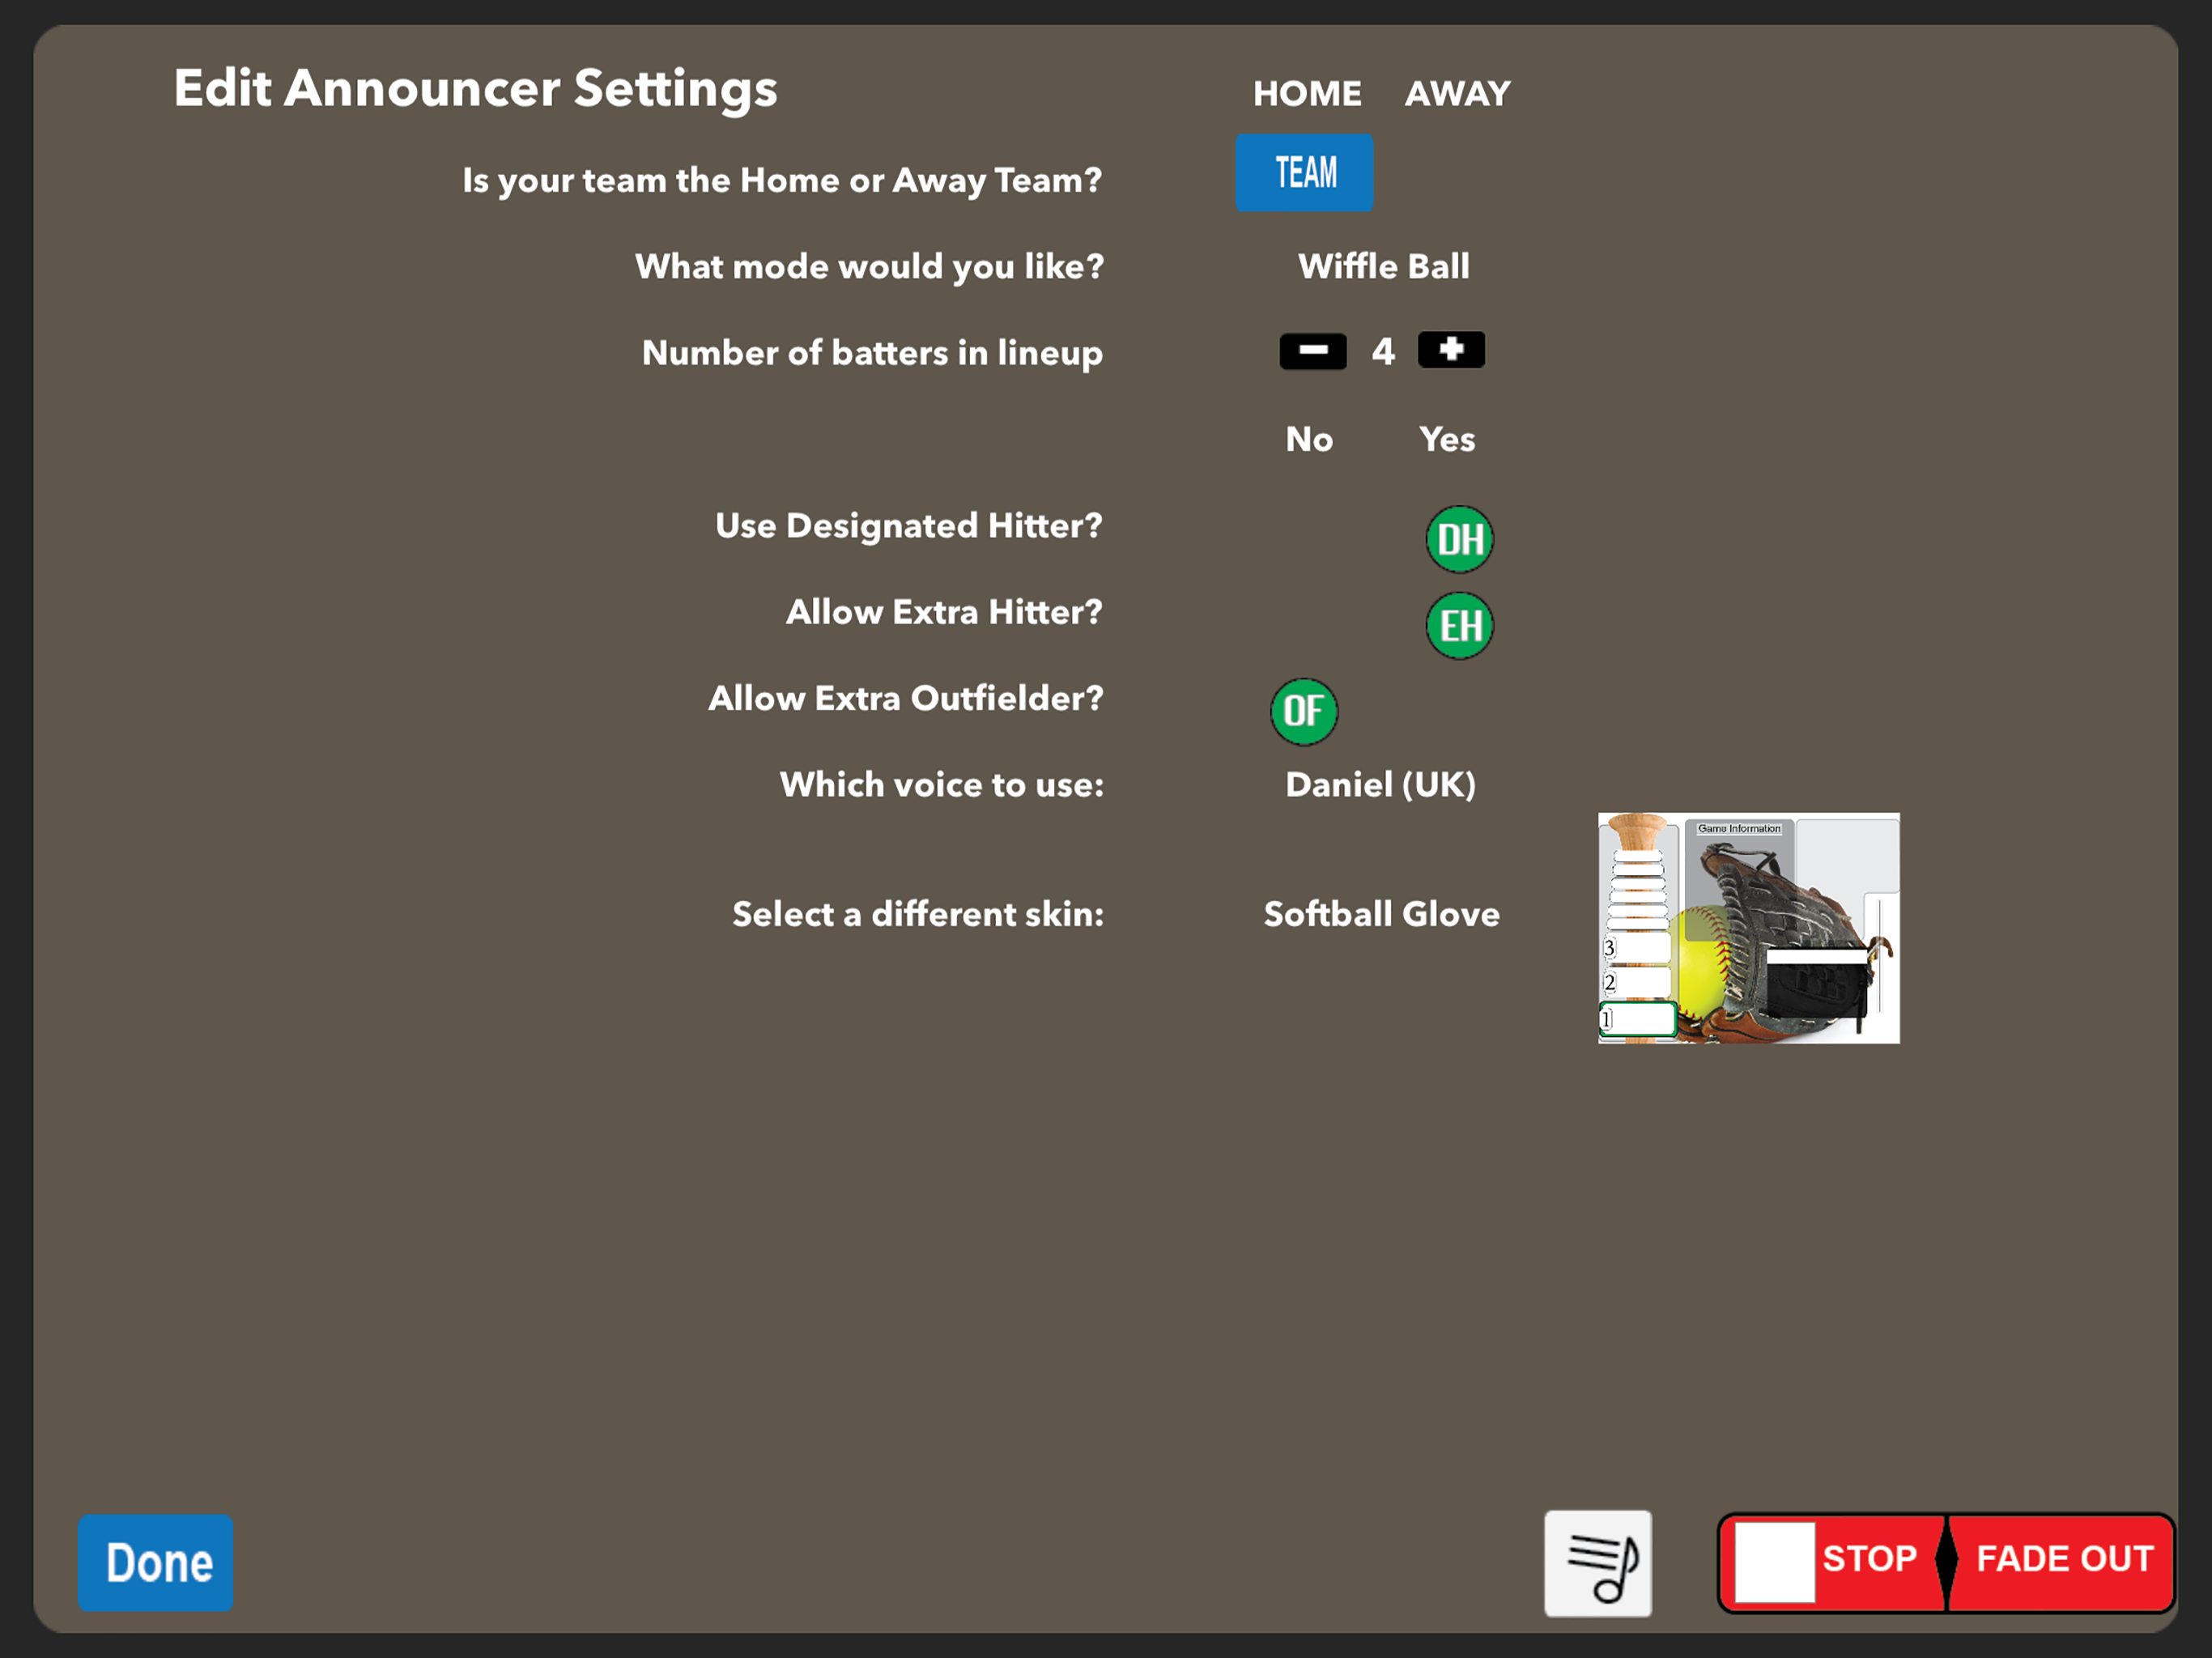
- Go to the settings page by clicking the settings icon at the bottom right
- Select whether your team is the home or away team by pressing the "Team" button
- Select which version of the app you are running (Wiffle, Travel Team, Ballpark)
- Increase or decrease the number of batters in your lineup
- Chose whether your team can have a designated hitter, extra hitter and extra outfielder
- Select from the voices available
- Choose which skin (background) you want to use
Edit Team information:
From the main screen, click the "Edit" button on the left side of the screen.
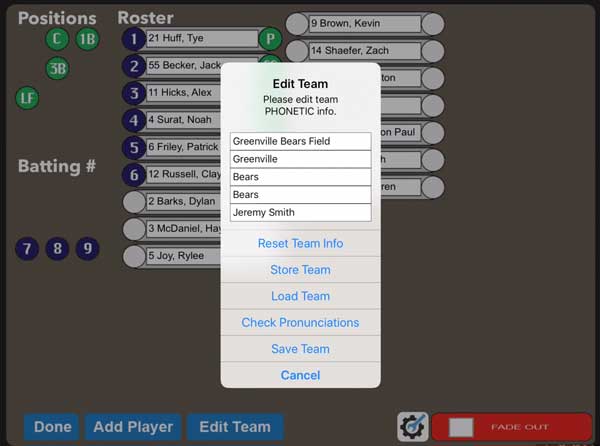
- Click "Edit Team" button
- Enter the requested information in PHONETIC spellings
- Ballpark - enter the name of the field or park where the game is being played. This is used for "Welcome to <ballpark> and today's game featuring..."
- Team name & Mascot fields. High school teams have mascots like "Greenville Bears" so you would enter "Greenville" for Team name and "Bears" as the mascot. Many travel teams, like "St Louis Recruits", don't really have a mascot so put all of it in Team name and leave the mascot blank.
- This is the scoreboard display for this team. Keep names to 9 characters or less.
- Press the "Check Pronunciations" button to verify pronunciations and change phonetics accordingly.
- This is also where you can store and load a team for recall (including player info).
Add Players to your team:
From the main screen, lick the "Edit" button on the left side of the screen
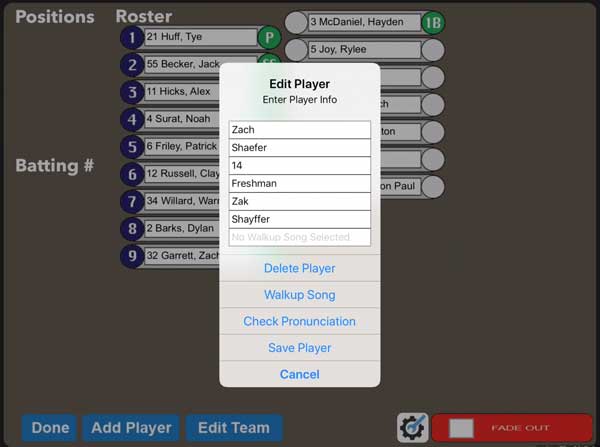
- Click "Add Player" at the bottom of the screen
- Enter player information:
- First name, last name and Jersey #
- Extra information like senior, or home town or school
- Click the button "Check Pronunciation"
- If the pronunciation of the first or last name is incorrect then attempt to phonetically spell the name in the provided boxes. This is all trial and error. For instance:
- Wyatt – WhyIt
- Zach – Zak
- If the extra information doesn't pronounce correctly, replace the words with phonetic spelling
- If the pronunciation of the first or last name is incorrect then attempt to phonetically spell the name in the provided boxes. This is all trial and error. For instance:
- Repeat for each player of your team
- To assign batting order:
- Drag each blue number and drop on the appropriate batter
- Click the number next to any player's name to remove him from the lineup
- Assign the green position buttons to each player in the field.
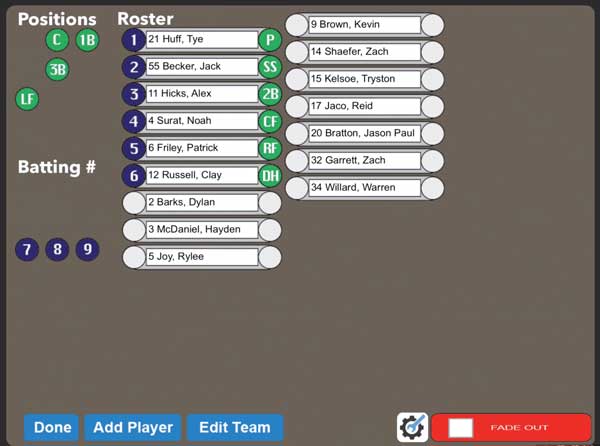
Edit the Opponent's Team (Ballpark or Wiffle Ball)
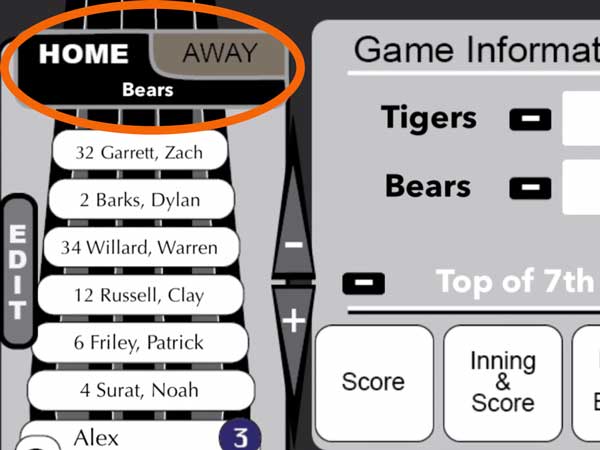 In Ballpark or Wiffle Ball mode, enter the other team info by toggling between the home and away team's lineup. Press Home / Away heading in the top left of the screen to toggle back and forth.
Once you have the Away team selected, click the Edit button and repeat the steps above for editing the Team info and adding players.
Edit the Opponent's Team (Travel Team)
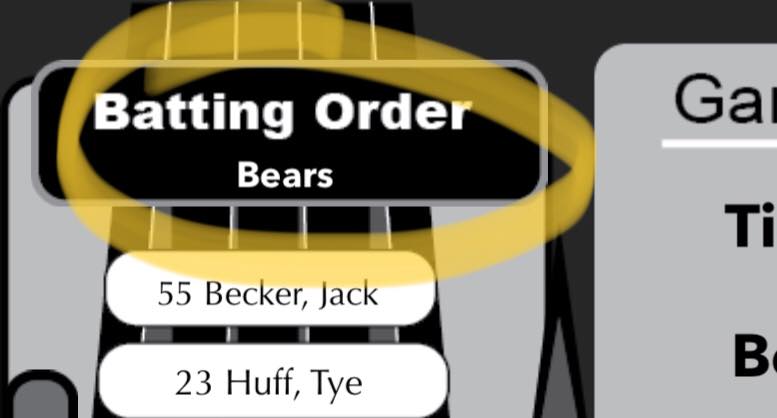 In Travel Team mode, press the "Edit" button and then press "Edit Game" to enter the information about the opposing team. These fields are identical to the "Edit Team" info.
Remember: all of these spellings are phonetic spellings EXCEPT for the Scoreboard Display Name.

Using The Song Editor

Gametime Announcer - Baseball - Using the Song Editor
Edit the playist, walkup and special effects songs
IMPORTANT NOTE: Apple Music and streaming songs from iCloud are not allowed in Gametime Announcer. All music must be OWNED and downloaded to your iPad.To edit the playlist and walkup songs, go to the Settings page. At the bottom right next to the red STOP button, press the Playlist Icon.
- The list of songs downloaded to your device will be displayed in the left
- For DJ Playlist songs:
- Select the song from the table on the left
- Make sure "PLAYLIST" is the selected tab (at the bottom)
- In the top section, flip the switch next to the word "Playlist" to designate this song as part of your playlist.
- Click the "Play" button and listen to this song...if the intro of the song is too long, you can "Mark" a starting point other than the beginning of the song.
- There are two sliders, the bigger one allows you to move anywhere in the song. The smaller one allows you to move forward or backward 1.5 seconds to fine-tune the edit point.
- Press the MARK button on the left to set the start point.
- If you would like to add a bit of fade-in, click the + above the FadeIn value to increment the fade-in by 0.5 seconds. The fade time can be from 0.0 to 5.0 seconds.
- An end to the song can also be marked if you prefer the song end sooner than the actual ending of the song.
- Again, set the fade-out by increase (+) or decreasing (-)the value.
- Click the "START" button to hear how the song will start.
- Click the "END" button to hear how the end of the song will sound.
- Click the Save button once you are satisfied.
- Notice the song in the table on the left now has a playlist icon
- For Walkup Songs:
- Select the song from the table on the left
- Make sure "WALKUP" is the selected tab (at the bottom)
- In the bottom section, flip the switch to the word "Walkup" to designate this song as a potential walkup song
- Mark the START and END of the section of the song as described above
- Click the Save button once you are satisfied
- Notice the song in the table on the left now has a walkup icon
- For FX & Specialty Songs:
- Select the song from the table on the left
- Make sure "SPECIAL FX" is the selected tab (at the bottom)
- Select which FX song this should be categorized as
- Mark the START and END of the section of the song as described above
- Click the Save button once you are satisfied
- Notice the song in the table on the left now has a Special Song icon
.jpg)